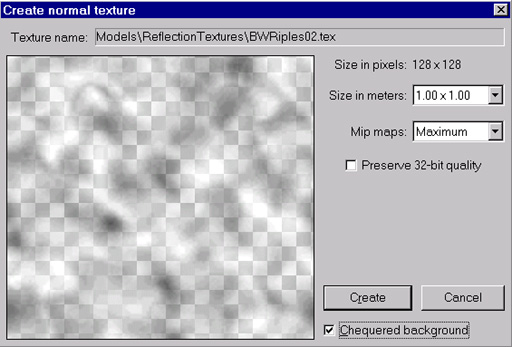
Things in realworld like metal, water, plastic etc.. have material properties to reflect enviroment around them. To simulate that in Serious Engine (without huge impact on CPU) REFLECTION maps are used. They can be any of 3 possible texture types supported in Serious Engine but 1st (still image) are ones to make sence using. Reflection texture dont replace diffuse, its added on model as spherical coat (shrinkwrapped aound it). Model can have only one Reflection texture (Figure 64 shows one typical reflection texture with alpha chanell ) and not all surfaces in model have to have reflection enabled.
|
| Figure 64 |
Usually they are greyscaled or colored fractal patterns or background created with Create Reflection texture tool. Load any model with diffuse map or create new one. Open Tools window and in Render tab click on Select all surfaces button and enable Reflections checkbox. Nothing changes on model. We need to add reflection texture for this model (Figure 63) by clicking on Browse reflection Texture button.
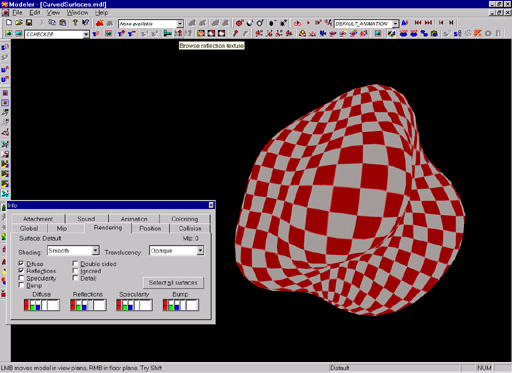 |
| Figure 63 |
After selecting proper texture, model changes its appereance (Figure 65).
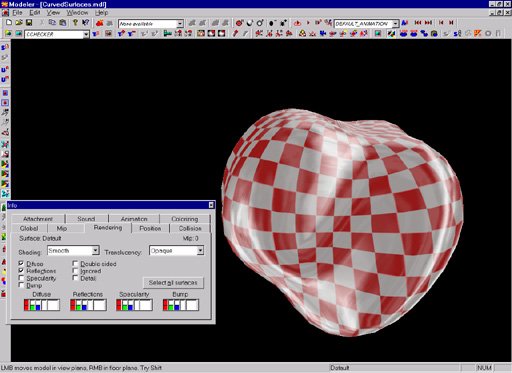 |
| Figure 65 |
If you rotate model around you will notice how it reflection changes. By default reflection strenght is 100% meaning model is 100% reflective. Color and reflection strenght can be changed in Reflection settings under Rendering tab (Figure 66).
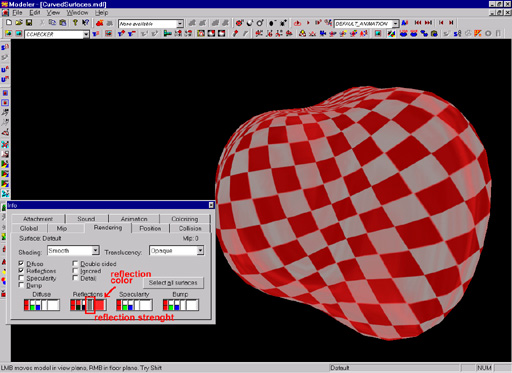 |
| Figure 66 |
All surfaces in model can have different color and astrenght settings (but all must have same texture). Serious Modeler have inbuilt tool for creating Reflection Textures. You need 6 panoramic images (90 FOV, Floor, East, Right, Ceiling, North and South ) either rendered in 3D application, photographed or saved from WorldEditor. When you have those 6 images ready run Reflection Texture Creator ( Figure 67).
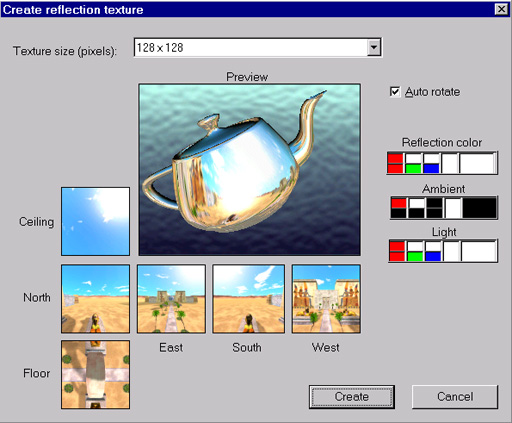 |
| Figure 67 |
To test created texture, Teapot is used. Click on black box right from Ceiling text and point to image used as ceiling. If filenames are like:
curved_envC.tga		ceiling
curved_envE.tga		east
curved_envF.tga		floor
curved_envN.tga		north
curved_envW.tga		west
curved_envS.tga		south
modeler will load rest of images automatically. Rotate teapot with LMB to observe created texture and click on Create button to save it (you can change texture size to be smaller than images texture is created from). After texture is saved load it as reflection texture and apply on model.
TIP1:You dont need to use large pixel size textures (256 or higher) for reflection texture.
TIP2: Use greyscale images as reflection texture and color them in Serious Modeler (from Rendering tab) for maximum flexibility and texture reusage.
TIP3:Since rendering reflection texture adds one pass in rendering of model, reflection texture can be disable in mipmodels (in manual mipmodel mode select mipmodel you dont want relfections to be rendered and surfaces you dont want reflection to be drawn for).
TIP4: Reflection looks best on higher polygon count models with curved geometry (reflection texture applied on simple box model wont give impressive visual appereance). Reflection texture can be added to model's script so when model is recreated texture will be automatically loaded.