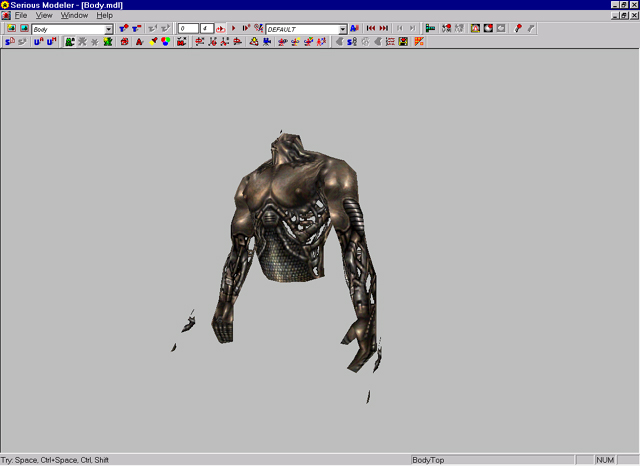
Next part is to add torso attachment. Image40 shows body.mdl which represents torso model.
|
| Image 40 |
It has been mapped and imported in same fashion as player model. With player model loaded open Attachment tab in Tools window, adjust player model on screen as on image41.
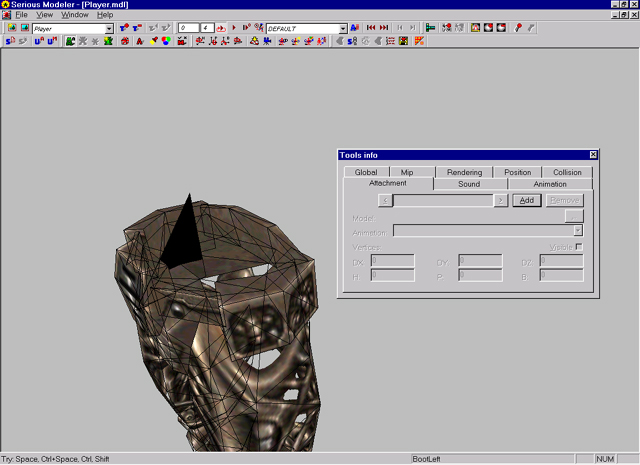 |
| Image 41 |
Click on Add button and point to Body.mdl. You should end with something like on Image42.
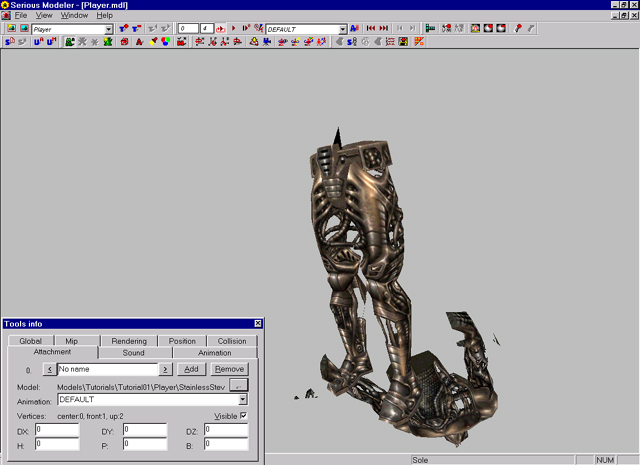 |
| Image 42 |
Body model is attached to player model, if you move, rotate player model, body will follow. Its time now to adjust position of attachment. For that, we will use triangle we created on player model. Position model so triangle is visible (Image43), press e to disable texture rendering and w to enable wireframe rendering (it will be easier to adjust attachment position).
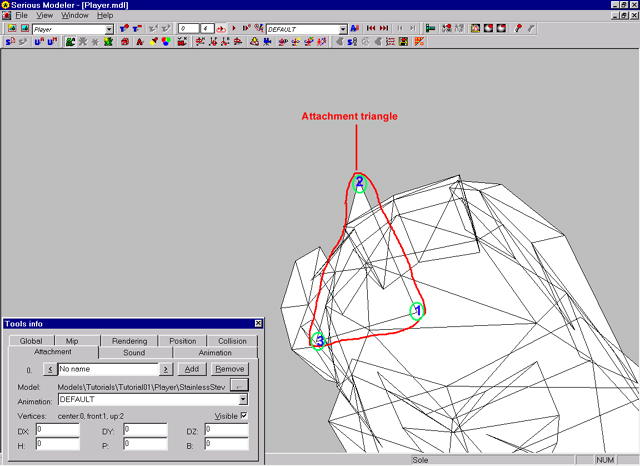 |
| Image 43 |
Disable visible option (attachment model wont render). Observe vertices circled green on "attachment triangle". They represent Center(1), Up(2) and Front(3) axis. Center is vertex on player model on which attachment will be "glued". Up and Front are orientation. Place mouse over "center" vertex and click 1 on keyboard. In attachment tab number next to center: will change to new number. This is player model's vertex number on which is body attached. Place mouse over "front" vertex and press 2 on keyboard. Last place mouse over "up" vertex and press 3. This completes adjusting attachment positions. Enable visibility in attachment tab. If you did all corect, body model should be attached like on image44.
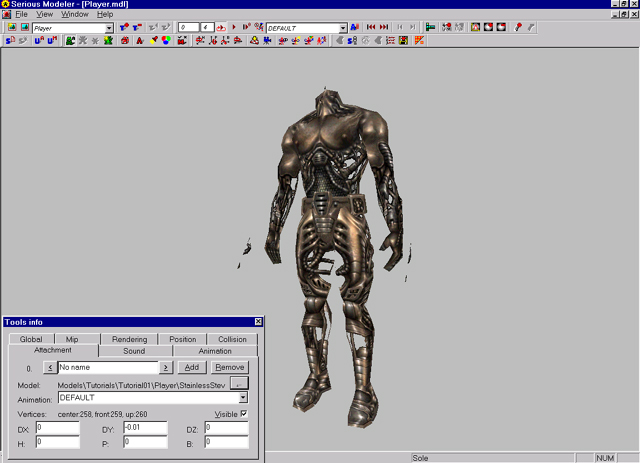 |
| Image 44 |
In position(DX,DY,DZ) and rotation(H,P,B) fields, additional adjustment can be done.
Final thing to do is to change attahment name to TORSO. This name is used by engine to know which model is refered as Torso. Additional models are added in same manner as torso. Click on add button to create new attachment set, point to model and adjust positions. Give it some reasonable name. You can also change default animation in animation pulldown.
As said earlier, "attachment" triangle wont be rendered. I assigned attachment surface to this triangle. In rendering tab, find this surface and click on invisible. This prevents triangle from rendering.
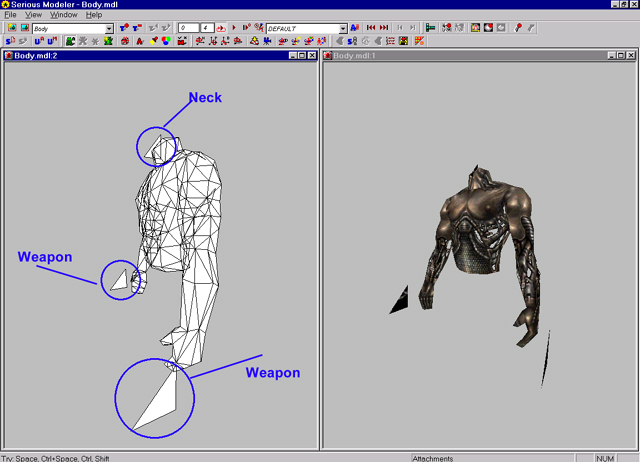
Next we will add Head model as attachment and weapons model attachment on body. Body model (Image45) has 3 attachment triangles, first on neck for Head, and two on hand palms for weapons and misc items.
 |
| Image 45 |
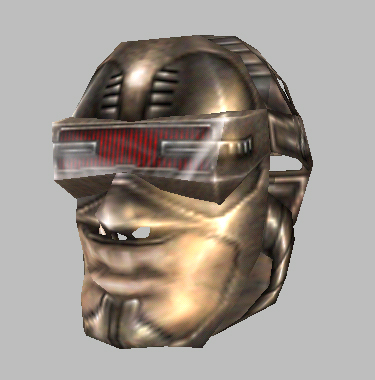
First, lets add Head model (Image46).
 |
| Image 46 |
Open attachment tab in Tools panel and click on add button. Point to head.mdl. Same as we did with body, select points on neck's triangle as attachment guide. Head position is seen on Image47.
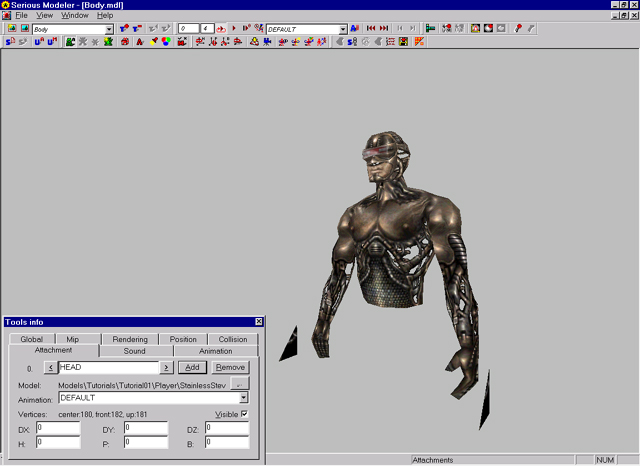 |
| Image 47 |
Rename "no name" to HEAD, so Engine will know what attached model is Head.
Next, we need to add weapons attachment. In Creating player model section of Serious Modeler Help, types of weapons with descriptions and attachment names are listed. First we will add Colt_Right. In attachment tab, click on add button, select ColtItem.mdl from models/weapons/colt folder. Zoom into right hand and select points: center,front, up (Image48).
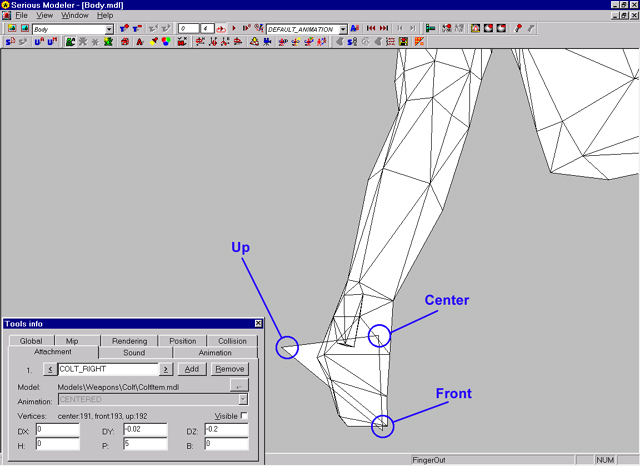 |
| Image 48 |
After adjusting positions and rotation, colt should look like in Image49.
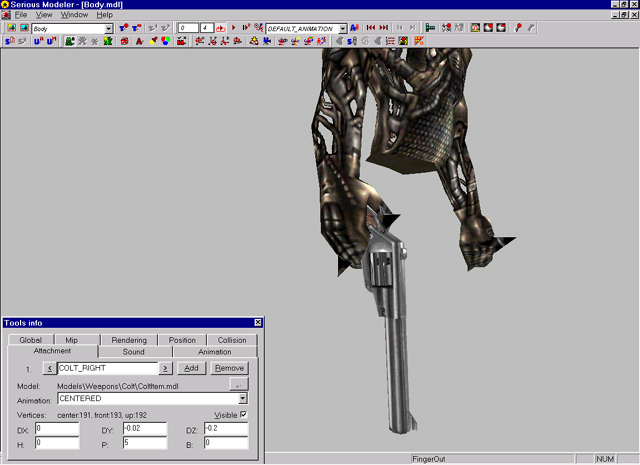 |
| Image 49 |
Repeat those steps for other weapons and items. Dont forget to give them appropriate names. In rendering panel select surfaces on attachment triangles and make them invisible.
Note: You dont have to use right hand triangle as attachment guide, depending on your model, you can position this attachment anywhere.