
|
| Steve |
Multiplayer models in Serious Sam are multipart models, consisting at least of 3 models: Player (representing legs), Body (representing torso) and Head (representing head, helmet or whatever). Since Serious Engine supports recursive, hiearchical approach to "attaching" (joining/parenting more models in single entity), additional models can be added and controled via powerfull scripts (.amc, attachment model configuration file).
Note: tutorial will be conducted in Lightwave v6.5, though any 3d application supported by Serious Modeler can be used.
Lets start with loading player legs player.lwo into Lightave Modeler.
 |
| Image 01 |
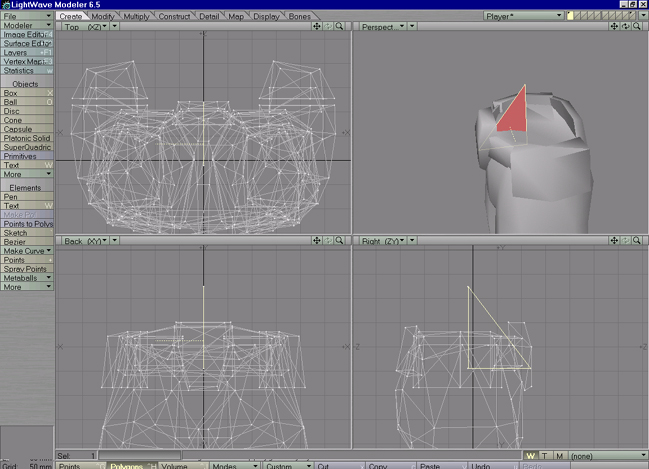
There are few things to note, when creating player model, object should be rested on ground, because Engine treats ground plane as 0 on height. Another thing, on player model body will be attached. Serious Modeler needs so called attachment triangle to know where to add body model on player model.
Another rules: all polygons in object that is imported must be triangles (error message will be display warning you about nontriangle polygons existing in object).
 |
| Image 02 |
Image02 shows this triangle positioned on object. It wont render in game (will be set as ignored in Modeler's rendering menu), but it will be used as guide when player model is animated.
Same as adding triangle for body, more triangles can be added for additional attachments, like knee caps, tail etc... All those additional model can be attached on single triangle, but since "attachment triangle" isnt rendered in game, the more triangles you add, the more control you have.
Next part is assign UV data on object. With latest build of Serious Engine, Modeler supports more than 1 UV map per model. When 3d object is imported in Serious Modeler, multiple UV maps will be merged in single (1st one) UV map. Though it may be handy to have multiple UV map per object, working with only one will eliminate possible problems.
When importing 3d object in Serious Modeler, there are few rules to follow regarding surfacing (assigning materials). Since assigning UV data means flatening and unfolding object mapping, seams will be created. Take look a Image03,
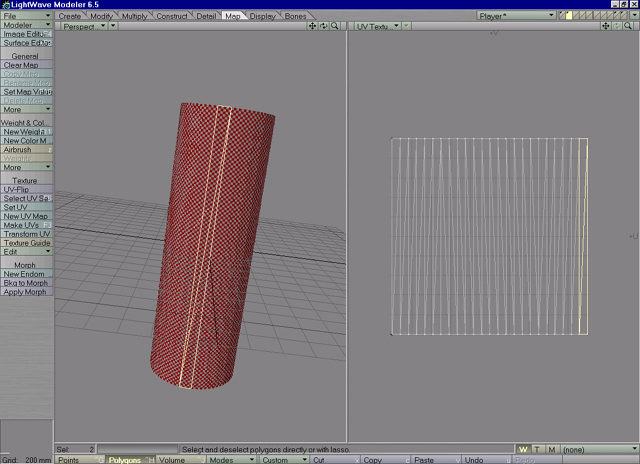 |
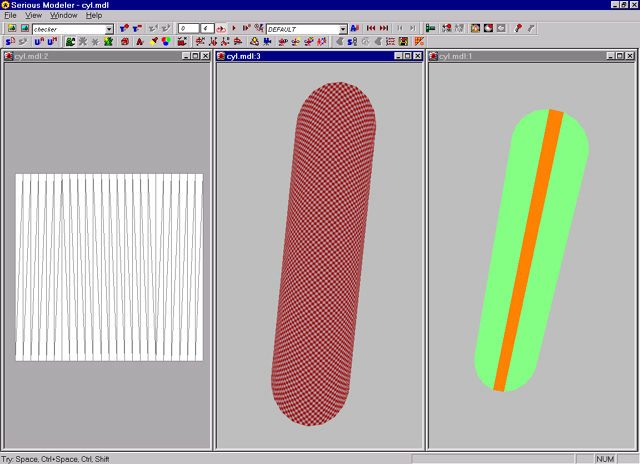
| Image 03 |
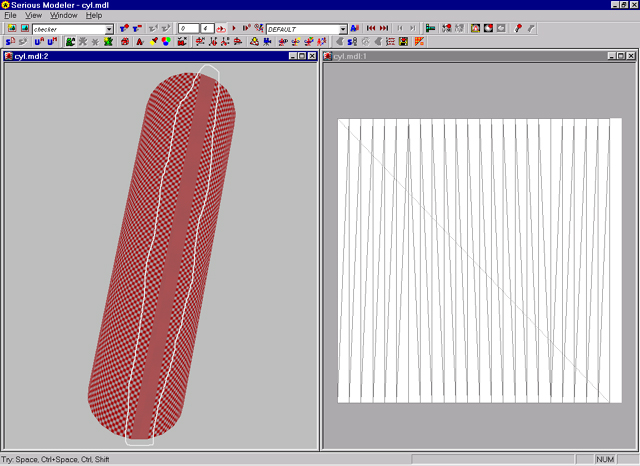
it shows disc cylindrical UV mapped with checker texture applied. Yellow selected polygons represent seam in UV map. This is place where so called stich is created, where uv mapping isnt continued. If we assign single surface(material) to this object and try to import it in Serious Modeler, mapping wont be imported properly. This is shown in image04.
 |
| Image 04 |
You can see selected with white outline texture stretched to 1 pixel on object and mapping that doesnt look exact like in Lightwave. Reason for that is with single surface/material assigned, you have 1 geometry vertex with more than 1 coordinate in UV map., i.e. there are more than 2 texture cooredinates in same surface/material with same UV valueattached to single geometry vertex. Image 05 shows those vertices on object and in mapping. Image05 shows 2 vertices on object with 4 mapping coordinates.
 |
| Image 05 |
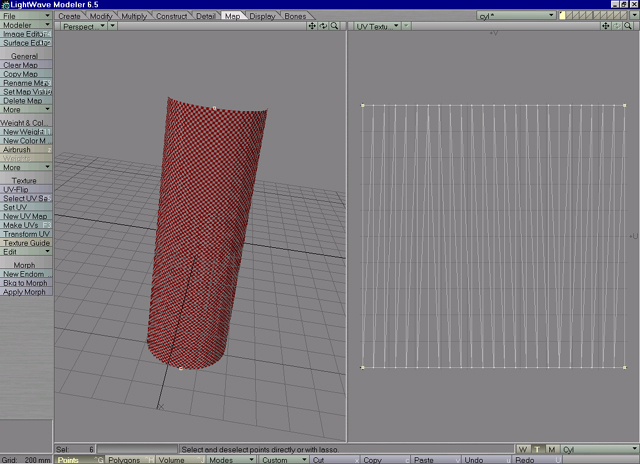
This mapping isnt supported in Serious Modeler, but there is an easy solution for that. All you need to do when come to such problem is to add new surface/material with same UV data to polygons on border of mapping (seam polygons). In Lightwave 6.x best way to find and select those polygons is to use "Select UV seam" function. Image 06 shows 2 surfaces with same UV map assigned to object.
 |
| Image 06 |
When you recreate disc model in Serious Modeler, mapping wont be stretched or wrong. Take a look at image07, 2 surfaces has been assigned on disc model and model is recreated.
 |
| Image 07 |
When uv mapping, you can work with object with single surface to ease process of creating mapping and then assign surfaces.
In low poly modeling, biggest chalenge when it comes to UV mapping is compromise between stiches in mapping (easier to map object with many stiches) and texture stretching. Consult your skin artist where to create stiches and where to have possible texture stretching. It is good to know what part of model will be less visible and create stiches in mapping there (like inside of arm, bottom of body or bottom part of head). Avoid creating stiches or texture stretching on muscles and highly visible parts of object like torso, face....
Another thing to have in mind is that object dont need to have proportional mapping, for example arm can occupy more space in mapping than bottom of torso, though it can sometimes lead to problems if face and head sides occupy different space in mapping, it will be hard to adjust continuity when texture is draw.