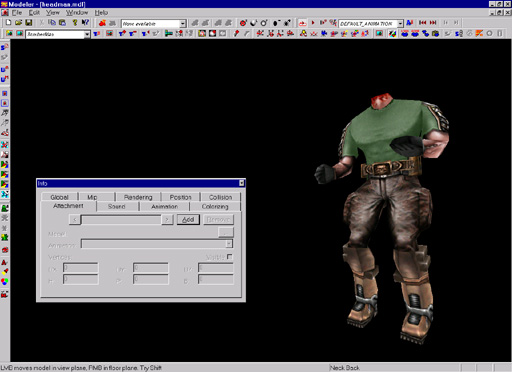
To finish model's functionality we need to add its attachments. For this tutorial we will presume that they have been made from .lwo objects using same tehnique as Headman.mdl itself. Run Tools window and select Attachment tab (Figure 52) which is empty for now.
|
| Figure 52 |
As explained in basic tutorial attachment models are parented to their attachment triangles found in Headman.mdl. To see them. select surface called Attachment Triangles from Rendering tab. Make them doublesided and toggle wireframe rendering (W). Position model like on Figure 53.
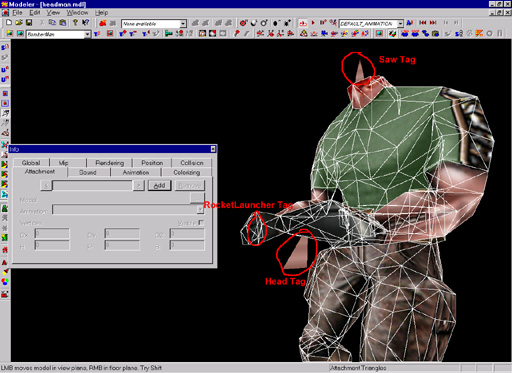 |
| Figure 53 |
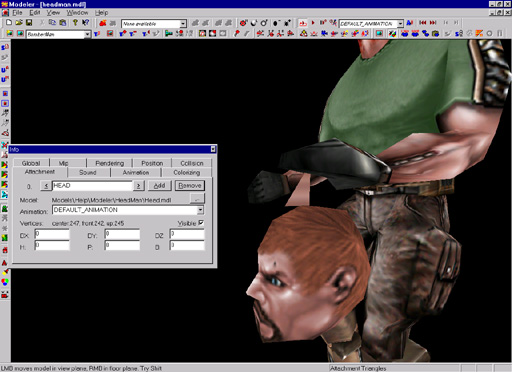
Click on Add button to add first attachment model and in requester that opens select Head.mdl. Rename attachment from No Name to HEAD. As you can see on Figure 54 Head isnt position as it should be (in left hand) so we will use attachment triangles as guide for right positioning.
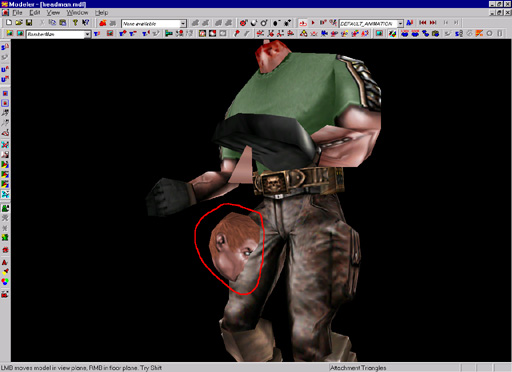 |
| Figure 54 |
Disable visible checkbox (its easier to adjust its place), toggle wireframe render, disable texture render (E), zoom left hand until you see it like on Figure 55.
 |
| Figure 55 |
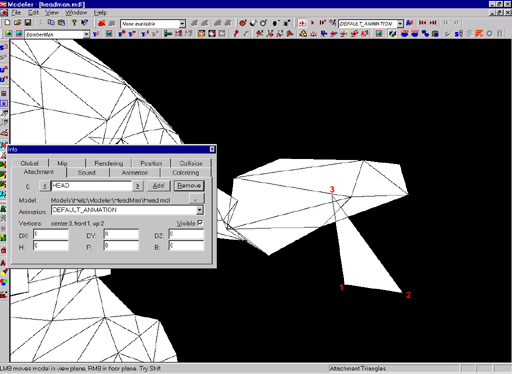
Now lay mouse cursor over vertex numbered 1 and press 1 on keyboard (number next to center in Vertices part of menu is changed), lay cursor over vertex numbered 2 and press number 2 (number next to front in Vertices part of menu is changed), lay cursor over vertex numbered 3 and press number 3 (number next to up in Vertices part of menu is changed). Enable attachment visibility and head should be attached to hand like on Figure 56.
 |
| Figure 56 |
As you can see head isnt well positioned in contrast to hand (it's to low positioned). Now we can manually adjust its position changing numbers in DX, DY and DZ editboxes. Type 0,09 in DY box and head should fit perfect in left hand (Figure 57).
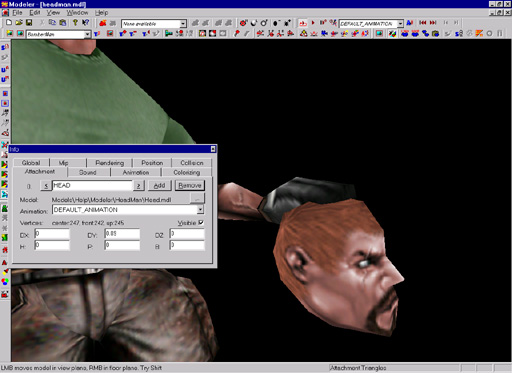 |
| Figure 57 |
To add more attachments click on Add button and repeat process of parenting models to traingles for each attachment (RocketLauncher....).
NOTE: more attachment models can be attached on single attachment traingles.
NOTE 2: you dont need to use attachment triangles, you can use any 3 vertices in object as triangle, but generally adding specific triangle guarantie precision. After ading all attachments select Attachment Traingles surface and in Rendering tab disable DoubleSided and enable ignored (this way polygons with ignored flag enabled wont render in engine) flags. Play few animations from model to see how attachments fit on model.(Figure 58).
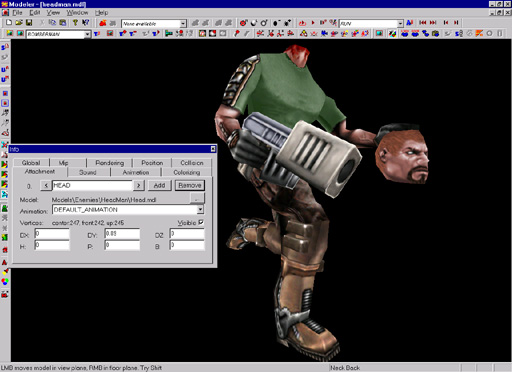 |
| Figure 58 |
NOTE: When making models that will be used as attachment, its best to position them centered around origin of coordinate system or that it lays on the ground. For example Head.mdl will be attached on neck. Attachment triangle on the neck of Headman.mdl is positioned as it was head itself, this way when you attach head to neck triangle it will fit on the neck without adjusting positions in Attachment tab.