Serious Modeler supports couple mapping modes (way you attach texture on model): UV and planar are most usefull tho Modeler supports cylindrical and spherical maping types. Texture (*.tex) types it supports are Still images (TGA or PCX), Animated sequences and Effect textures (created with Modeler's tools).
Couple rules and advices must be followed in order to achive maximum performances and corect display:
1) Image texture size must be power of 2 i.e. 64x64 or 8x256 or 1024x256 pixels where first number represents width and second height.
2) All textures must have size in meters ( how many meters does texture cover i.e. if texture is 256 pixels wide how many meters of model will those 256 pixels cover) , that depends on size of model. For example if you are making very tall tree, lets say 32 meters tall and want its texture to tile (repeat) 4 times you will create texture 8 meters in height so it will tile 4 times to cover 32 meters tall tree.
3) Textures can have alpha chanel (TGA 32bit), for example to make teeth of character via transparent texture blending mode (explained later).
4) Textures can have mip maps ( way Opengl renders very distant polygons with texture in them) wich you can creat in Modeler.
5) Texture are allways 32bit when you create it from image, so no losses will happen during making.
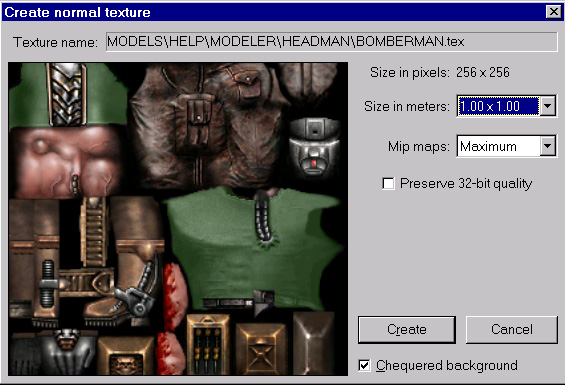
Since Headman model allready have couple textures loaded press CTRL SHIFT R to recreate one of loaded texture or click on RECREATE TEXTURE button. Menu like on Figure 18b appears.
|
| Figure 18b |
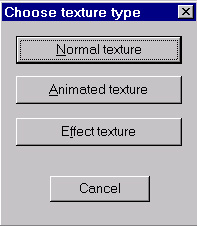
(NOTE: to recreate texture, image from which texture was created must be present on hard disk in same folder as .tex file). As you can see in it textures' size in meters, number of mipmaps, etc can be adjusted. All those parameters are saved in .tex file so every time you recreate texture it will offer those settings as default. Press CREATE to recreate texture and close this menu. Recreate is used if you allready have texture created from image file and want to change parameters or image file has changed. Lets say you want to create new texture for Headman, press CTRL SHIFT T or click CREATE NEW TEXTURE button. Menu like on Figure 18c appears.
 |
| Figure 18c |
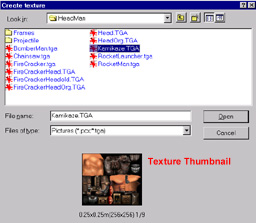
From here you can make NORMAL texture (still 2d image , tga or pcx), ANIMATED texture (sequence of 2d images , tga or pcx) or EFFECT texture (opens modeler's tool for creating algorithmic procedural textures, used to create effects like water, fire, plasma etc....). Click on NORMAL texture to open requester asking you to select image file (Figure 18d).
 |
| Figure 18d |
Click on Kamikaze.tga and menu same like one from RECREATE TEXTURE appears. Click on CREATE button and Kamikaze.tex is added in list of textures for Headman model (with Page Up/Down you can cycle between loaded textures).
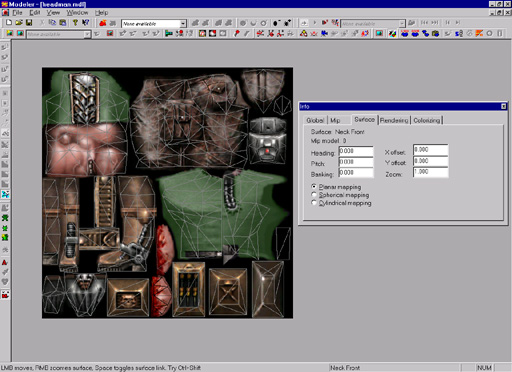
Now lets see how this textures is mapped on model. Press Mshortcut or press Toggle Mapping mode icon to access Mapping mode. Figure 19 shows model's mapping (UV ) with curent texture.
 |
| Figure 19 |
With CTRL RMB you can zoom in out view (that wont actually change mapping). SPACE LMB combination moves view (same like model in rendering view). Pressing Q toggles Tools window where additional properties of surface or rendering can be adjusted.
Pressing RMB opens Context menus (Figure20) where additional preferences (like in rendering view) can be adjusted.
 |
| Figure 20 |
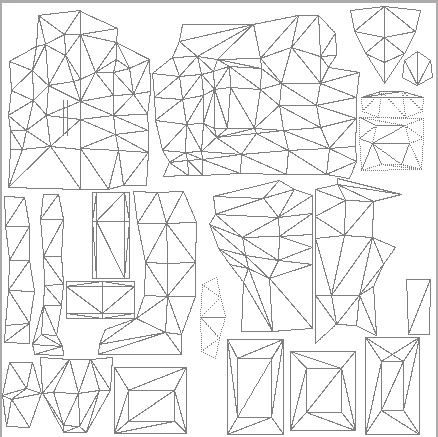
Pressing B shortcut toggles off texture rendering (Figure 21) and leaves mapping rendered, so you can check if mapping is loaded corectly.
 |
| Figure 21 |
While in that mode you can press ALT S to take screenshot of mapping mode and use it as template for creating texture in painting application.
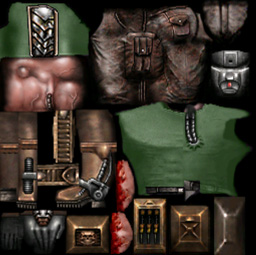
Pressing A disables mapping rendering (Figure 22).
 |
| Figure 22 |
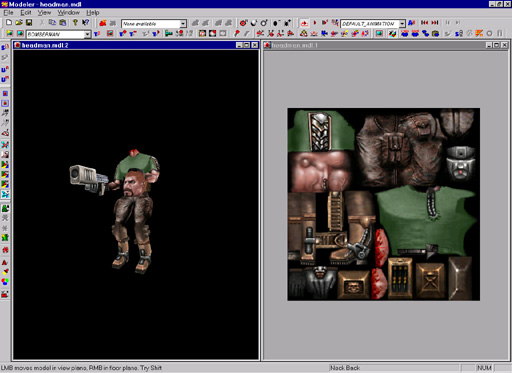
Since Serious Modeler is multiple-document application more than one view can be opened in same time, mapping and rendering view. To do that, press in Window pulldown menu NewWindow button. Now same model is opened twice in Modeler (you can see number in Window Title bar). Now in window pulldown menu press TileVerticaly button and Modeler should look like Figure23.
 |
| Figure 23 |
This way you can manipulate mapping and see changes immidieately on model in Rendering view. Others mapping types and mapping tweaking will be discussed later.