Basic room tutorial
In this tutorial we will create a room. The room will be pretty simple, but will contain some columns. It will be textured and lighted. At the end of editing, we will apply reflection to the floor, add one enemy and play-test what we have done. This tutorial goes along with accompanying movie of a room creation process. You can download a movie from the Croteam site.
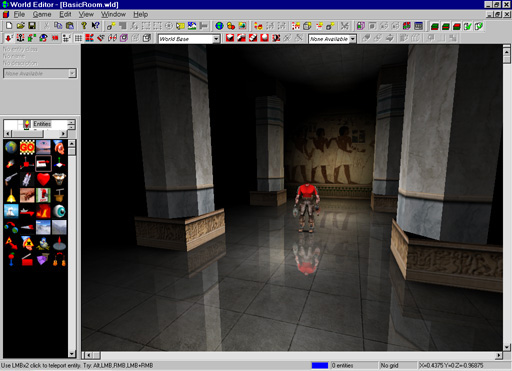
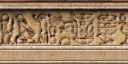
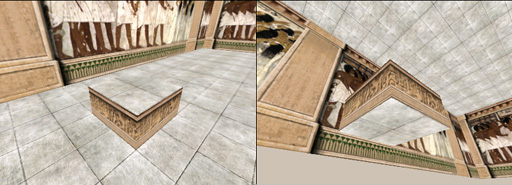
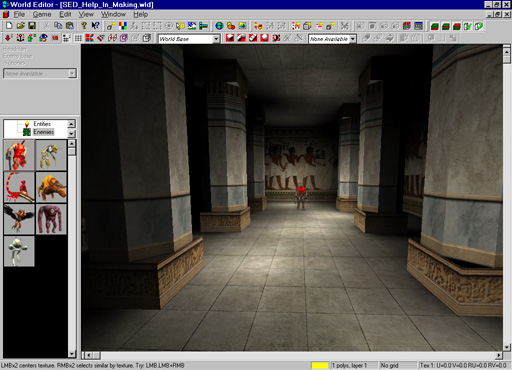
This is a screenshot of a room that we will create:
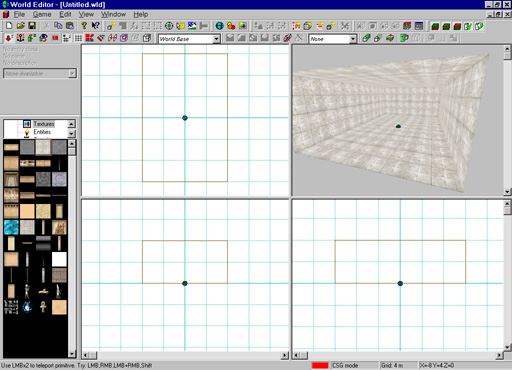
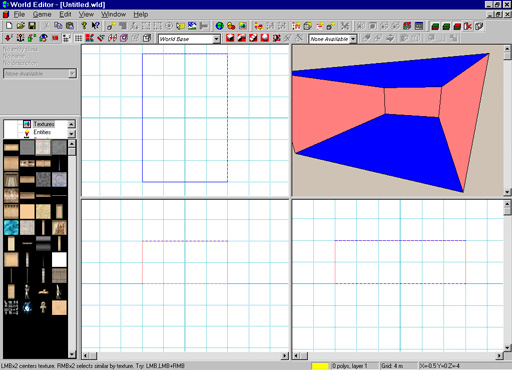
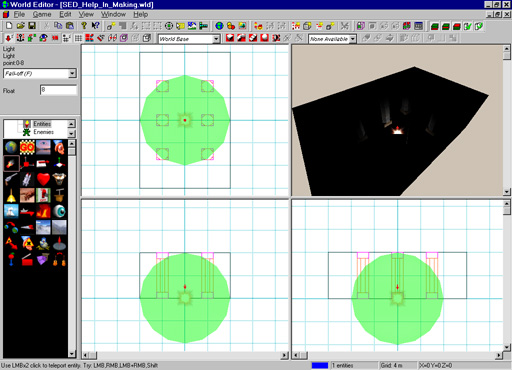
First of all, we have to create a new document (world). We do it using the File/New command. When the new world is created, we can see a small spherical object that looks like the Earth (see picture).
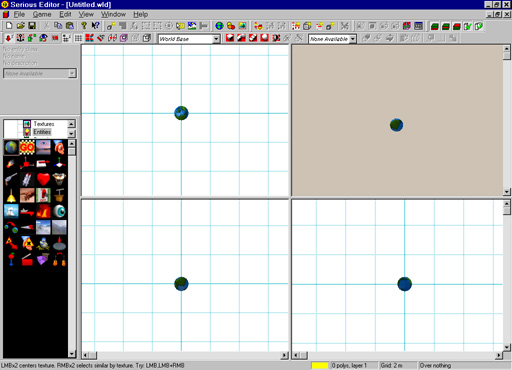
This is our first brush entity of the world. Since it has no polygons yet, it is called empty brush. Serious Editor displays empty brushes as small globes. The brush will be displayed as a globe until we apply an operation that will create some polygons.
To add some polygons, we will drill a room in the infinite solid material of this new world. To do so, we will invoke a Conus primitive by clicking on  . As we clicked on the tool button, mode indicator turned red, indicating that we are in layer mode (CSG mode), and the Tool window appeared. We will type parameters that will define our primitive. Notice that typed value will not be applied until Return key is pressed. Since we want to create a room, we will set room flag to on, meaning that primitive will define interior. This way we will get a room surrounded by walls. If we didn't set room flag to on, we would get a box with polygons looking outward.
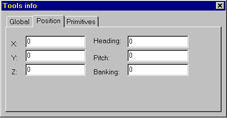
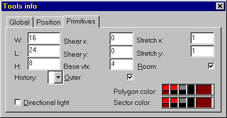
For our example we will use a room primitive with parameters like this:
Position: X=0, Y=0, Z=0
Orientation: Heading=0, Pitch=0, Banking=0
Size: Width=16, Lenghth=24, Height=8
Shear: X=0, Y=0
Stretch: X=1, Y=1
Vertices 4
Room flag: On
For the given values, Position and Primitive pages of the Tools window should look like this:
 |
|
 |
We have to select default texture for our primitive. We will do that by double-clicking on a texture thumbnail in the Browser window.
First we have to invoke virtual directory that contains textures. You can do this in three ways: by browsing to the "Textures" directory in the upper window showing directories, by pressing W and clicking "Textures" button (offered directories have keyboard shortcuts set) or by pressing the shortcut key of the "Textures" directory (3 on the main keyboard).
Now double-click on third texture in first line to apply it for floating primitive.
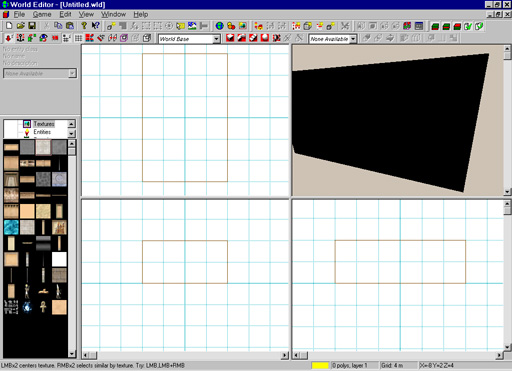
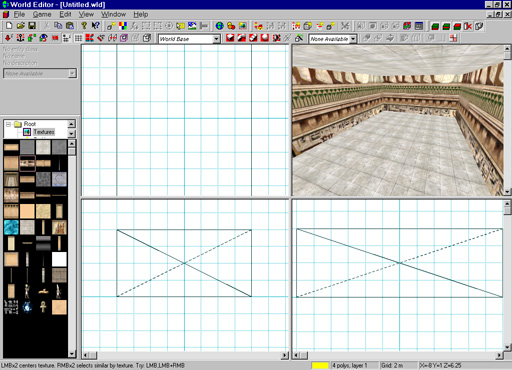
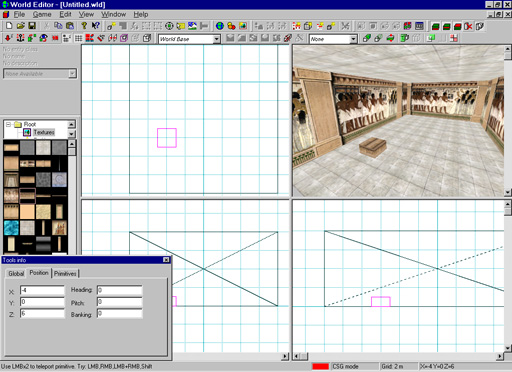
Now Serious Editor layout should look like this:
If you did anything wrong, and the primitive does not appear the way it should, you can always press theCancel CSG tool button ( ). It will cancel the CSG mode, without applying any changes.
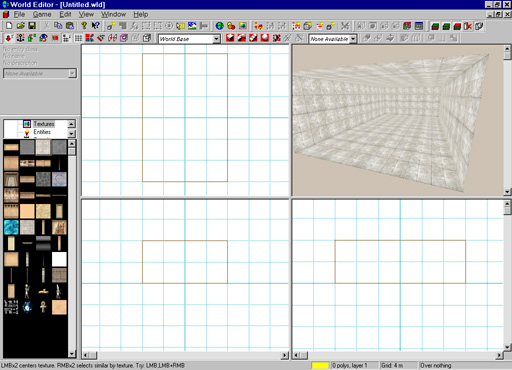
To drill a hole in the infinite solid material of the world, we will have to add this room primitive. Press the CSG Add tool button ( ). You can as well press the keyboard shortcut for CSG Add which is + on numeric keyboard. When you have added the primitive, CSG mode is turned off as the floating world and the editing one are merged. Our world should look something like this:
Again, if you did something wrong, you can press Ctrl+Z to undo the CSG operation. The room is here, but is completly dark because there are no lights. We will add some lights later, but first we will texturize this room. That means that we have to switch to polygon mode. You do that by pressing P. Mode indicator must be yellow. To be able to texturize without any lights added, you have to turn off the shadow maps. Shadows are toggled by clicking the Toggle Shadow button  or using shortcut H. Tool button with shadows turned off should look like this:
  .
.
World is now rendered in full bright:
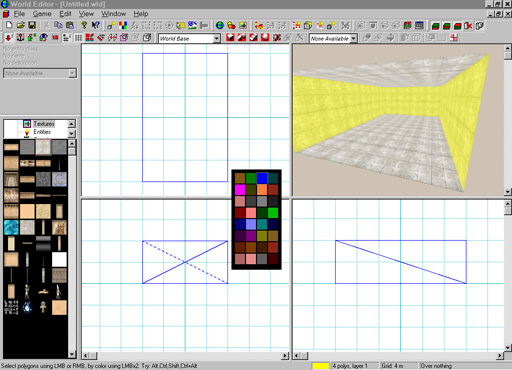
Serious Editor uses polygon grouping for easier selection. Each polygon can be colorized individually. You can use colorizing to group individual polygons at your preference. Polygons grouped in this way can be quickly selected by double-clicking. You just have to double-click on any of the group's polygons and the whole group will be selected. All polygons of a primitive are colorized with the same color by default. That means that we will select all 6 polygons of our room by double clicking. As you try it, you can notice that the polygon selection is displayed as a yellow filter. If we want to group only polygons that form the walls, we will have to colorize them. First we have to select them. We select them by selecting all polygons (double-click on any) and then deselecting the floor and ceiling (deselect them by clicking on them while holding Shift). We can also select each of the wall's polygons by shift-clicking them. When we selected the wall polygons, we should colorize them. Colorization is carried out through Colors palette window. Colors palette is invoked using tool button  or by shortcut C. Our room with selected walls and invoked Colors palette looks like this:
When we click on a color from the Color palette, polygons get colorized. Selection can be canceled with the tilde key (~). Note that tilde key will work only on some keyboards. You can also deselect by mouse click. Deselect the polygons. We will examine polygon grouping in color rendering mode. There are numerous parameters for controling rendering at your disposal. Rendering parameters can be set for each view. All views of a window form one window configuration. You can define up to 10 window configurations with rendering modes at your preference. Window configurations are stored and restored using numbers on numeric keyboard (they are stored when holding Ctrl). Color polygon rendering mode is stored as the window configuration no. 2 by default (can be invoked with Num 2 ). Commonly used window configuration with three isometric projections and a textured perspective view is stored as the configuration 0.
Our room rendered using polygon colors looks like this:
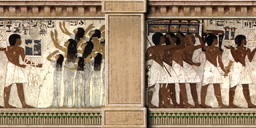
Switch back to window configuration 0. Now we will texturize the room. Double click on a wall. You have selected all four of the wall polygons. Yellow selection filter will bother us when texturing, so we will turn it using button  or shortcut Z. We still have the polygons selected, but the selection is not visible any more (right part of status line displays a message with the count of selected polygons). Open the virtual tree directory containing textures (shortcut 3). Double-click the texture of Egyptian painted wall texture (second column, second row) that looks like this:
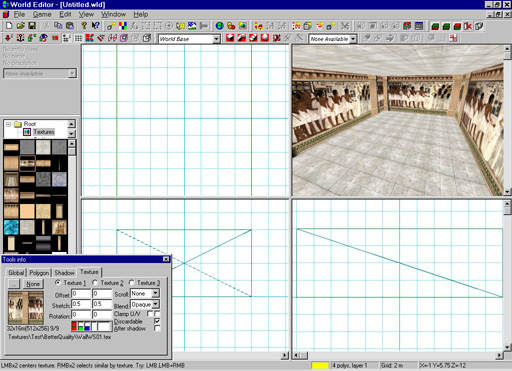
We applied the texture over the selection. Now we have something like this:
We have to adjust mapping of the textures to fit on our walls. We can adjust offset, rotation and stretch. Press Q to invoke the Tools window. Texture property page is used for defining mapping. After we typed 0 for offset and rotation, we have to type 0.5 under texture stretch for both axis. Now we textured our walls properly. The interface enables few more things for mapping control: +-90 deg. rotation (Tab, Shift+Tab), 2x zooming (Ctrl+Alt+LMB/RMB), mapping moving (Ctrl+LMB+mouse move), mapping teleporting (Ctrl+LMB double-click), spreading mapping using copy (Ctrl+C) and paste (Ctrl+V), ...
This is how our room looks with textured walls:
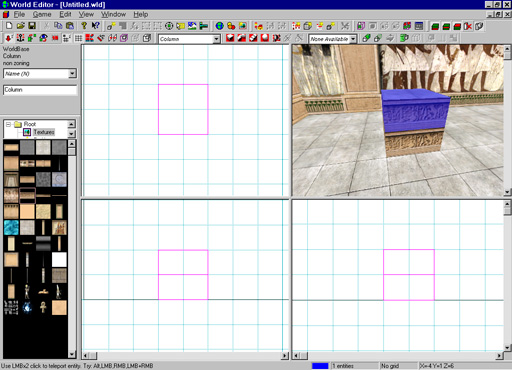
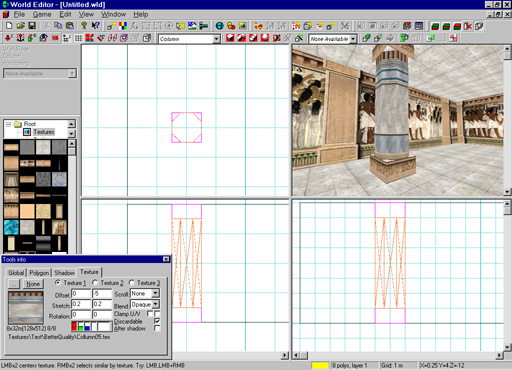
Now we will create a column. It will have a footer, body and a header. Footer will be created from a conus primitive . When you invoked primitive it seams like your room is messed up. It is not erased nor destroyed, it is just that new primitive has same size as your textured room, and is rendered over it. Newly invoked primitive always has same size as last primitive that has been applied. Overlapped rendering occured because of this. Set Width to 2, Length to 2, Height to 1 (size 2x2x1). Set 4 vertices, Room flag off. Double-click on the texture named "Textures\Test\BetterQuality\Border10.tex" (check name using tooltip). Here is how it looks like:
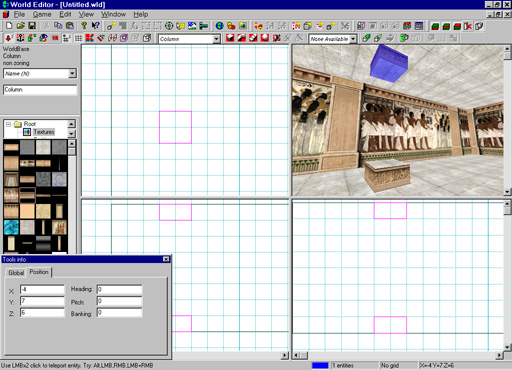
Move primitive using Ctrl+LMB in the top and front views until it reaches coordinates x=-4, y=0, z=-6 (you can check coordinates on the status line or set them manually using the Position property page).
Layout should look like this:
We will not add this primitive using a CSG operation, but will add it in a way that will not merge their geometry. We will join these two worlds. This means that no mathematical operations will be applied. The entity that holds the column footer from floating world will just be copied into the edited world. This operation is called Join layers and is applied with button  or shortcut L. We can see that the mode indicator is blue informing us that Serious Editor switched to the entity mode. If we turn on selection filter ( or Z) we can see that the footer is now an entity. That means that it can be moved around because it is not merged with the other entity (our room).
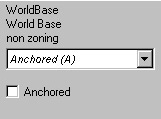
Since moving of entities that form architecture is dangerous (imagine moving our world but leaving torches and other objects in place), it is disabled by default. You can enable it if you turn off their Anchored flag. We will also turn off the Zoning flag. This is a way to tell the engine that this entity does not define zones in the world, but is considered to be a detail object.
We will turn off these flags using the Entity property dialog. First we have to select a property that we want to change. Let's say Zoning flag. Using the combo box on the Entity property dialog, we select "Zoning (Z)". The lower part of the dialog shows a checked check-box. Clear it. Do the same for the Anchored flag. Here is how it should look like when turned off:
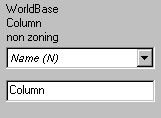
Now we will give a descriptive name to the column. Select the property named "Name (N)". Lower part of the dialog enables you to edit a string. Let's name it "Column". This is how it should look like:
We can see now that we have two entities in the world: a room and a column footer. We have to select which one's geometry we will edit. To set which entity will be modified, right-click it and choose Select brush menu item. Combo box embeded in the tool bar left to buttons that invoke primitives should show: "Column":

Now we will texturize the column base. First we switch to polygon mode (P). the mode indicator is yellow. We will copy texture from the room floor to the top and bottom polygons of column footer. Put the mouse pointer over the textured floor. Press Ctrl+C to copy mapping and texture values. Put the pointer over the top polygon of the column footer. Press Ctrl+V to paste texture and mapping properties from the clipboard. Do the same for the bottom of the collumn footer. Rotate to see bottom and paste the clipboard properties over the bottom polygon.
This is how texturized column footer should look like:
Column header will be created as duplicated column footer. Switch to entity mode (E). Select the column footer using the left mouse button. It should be blue. Copy it with Ctrl+C. Move mouse over the top view and point in the middle of the box representing the column footer. Press Ctrl+V to paste the column footer. You should have a situation like this:
Now move the selected column header to coordinates -4,7,6. It should result in this:
Add geometry of the column header to the column footer. You will do it by pressing () or Num+. Make sure that the combo box displaying curent brush shows: "Column". When you added the header to the column footer, try selecting the entity. You will see that the footer and the header define geometry of one entity. We have to connect footer and header with a column body. We will use the Conus primitive () with 8 sides.
Position: X=-4, Y=1, Z=6
Orientation: Heading=0, Pitch=0, Banking=0
Size: Width=2, Lenghth=2, Height=6
Shear: X=0, Y=0
Stretch: X=1, Y=1
Vertices: 8
Room flag: Off
Texture: Textures\Test\BetterQuality\Collumn05.tex
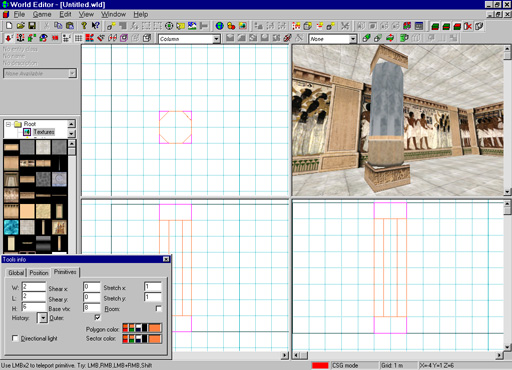
You have to add () the column body primitive. Adjust mapping to fit the collumn body (adjust it on one polygon, copy mapping from it, select all polygons that form column body, and press paste when mouse is over selected polygon). It should look like this:
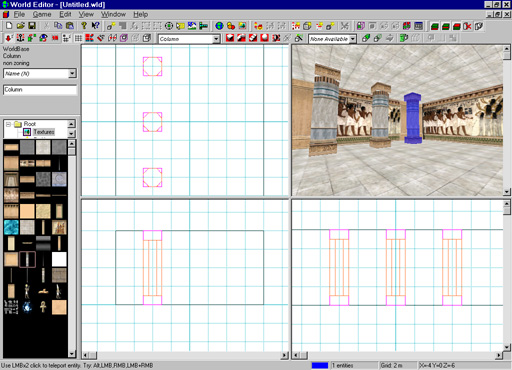
Now we have our column as an entity. We will multiply it to get 6 columns. Switch to entity mode, select the column (should be blue). Copy it. Move the mouse pointer over the top view and paste column twice, every 6 meters. Now you should have this situation:
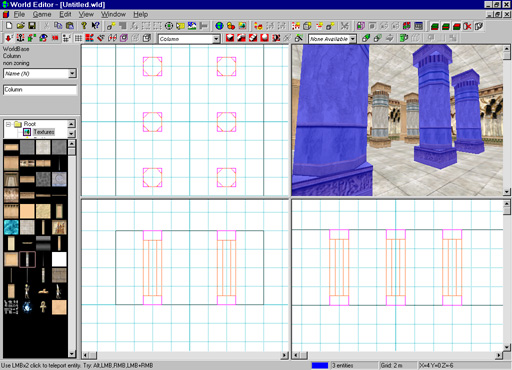
Hold Shift and add the other two columns to the selection. Copy all three of them and paste them into the right part of the room. This is what you get:
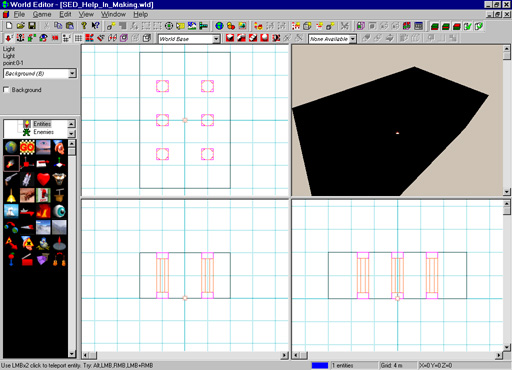
We have to add some lights to our room. To see the light influence, we have to turn on shadows ( or H). Perspective view displays our room in complete darkness. Now select the virtual directory containing entities. That directory is named "Entities" and invoked with shortcut 1. You will add a light entity using the drag and drop interface. Left-click on the light thumbnail ( ) and drag it over to the perspective view, drop it somewhere near the center of the coordinate system.
This is how world with the dropped light entity could look like:
We didn't notice any change in the perspective view, world is still dark. This is because shadow clusters are too big by default (2 m) and light's default range of influence is very small (1 m). First we will increase shadow quality. Switch to polygon mode (P) and select polygons that form walls of the room (double-click). Invoke tools window (Q). Set shadow size to 0.5 m using combo box on shadow property page.
Now we will increase light's fall-off. Switch to entity mode (E). Make sure that the light entity is selected. Select its property named "Fall off (F)". We should change its value to, let say, 8m. You enter 8 in edit part of entity property dialog, and press return (try setting a bigger fall-off value and then move light around. You will notice that the shadows are cast in real-time.).
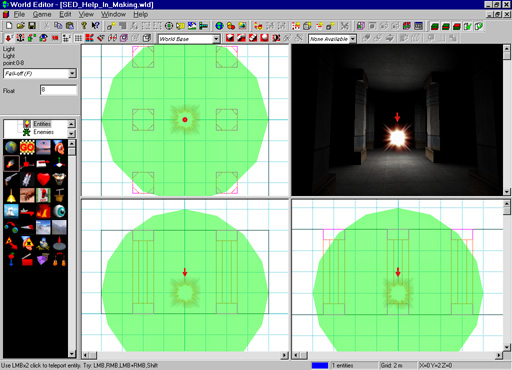
This is what you get:
The green circle displays range of light's influence. We can see some little lighting on the columns in perspective view, but that's not what we want. This is because our light is in the floor (as we dropped it to coordinate with 0 altitude). Move the light towards up in front or side view for 2 meters. Now we can see lighted floor:
We can modify light's color. Select property named "Color (C)". The edit part of the Entity property dialog offers light editing using a control called Color button:
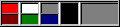
The Color button is divided in two parts. Right part of the button displays current color. If you click on it, you will be prompted to select a color using a standard Windows color picker. Left part of the Color button is used for continuous color editing. The three upper boxes visualize Hue, Saturation and Value of the current color. The three lower buttons visualize Red, Green and Blue components for the current color. A tall black box in the middle of the button visualizes Alpha chanell of a color. Tool tip displays values of these color components. Any component of a color can be modified by clicking on appropriate area and moving mouse horizontaly while holding the left mouse button down. By changing value for hue to 32 and saturation to 32, we colorized the light a little bit:

We need to add some more lights to our room. The easiest way is to do that is to copy the existing light and paste it few times over the room:

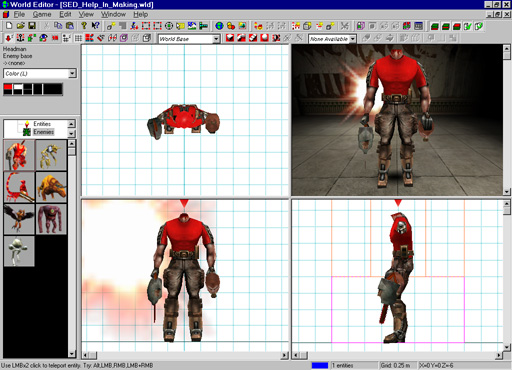
Now we will drop an enemy to add some action. Invoke the virtual directory named "Enemies" (invoked using 2). Drag the first enemy, "Beheaded Firecracker". Drop it somewhere between the two topmost columns as seen in the top view. We need to rotate the enemy because he is facing the wall. We can do that by typing 180 into the heading control on Position property page or by rotating the entity for 90 degrees twice (using Tab). You can press keyboard shortcut A (as allign) to focus on enemy. This is how it looks from close-up:
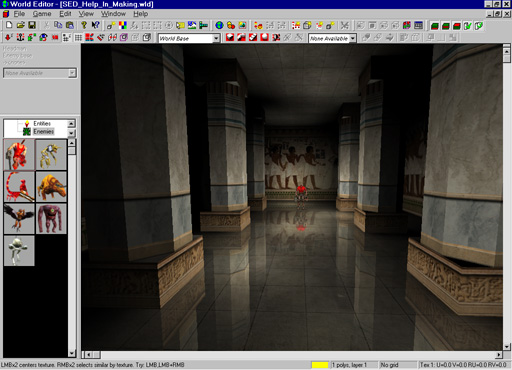
The last thing that we will do before game testing is to add reflection to the floor. Switch to polygon mode (P). Select floor polygon using left-click. Turn off selection display (Z). Invoke perspective-view-only configuration. Window configurations are changed using numeric part of keyboard. Be sure that NumLock is on. Perspective-view-only configuration is stored under window configuration 6, so press key 6 on numeric keyboard to invoke it. Your layout should look like this:
Invoke Tools window (Q). On the Polygon property page select "std mirror 1" int the Mirror combo box. On the Texture property page, choose "Blend" in the Blend combo box. We still don't see any reflections. This is because the floor's texture is opaque. We have to decrease its opacity to enable floor's reflectivity. We will increase texture's transparency when we decrease alpha value for the texture's color. We change the alpha value with tall button, placed in the middle of the color button. We will set it to 96, simulating very reflective surface. This is the how the final room should look like:
All we have to do now is to play-test this room. Test game mode is invoked with key T.
Troughout this tutorial you exercised how basic architecture is created, some textures and lights applied, and enemies added.
We congratulate you on your first world built using Serious Editor.